Tab Top Curtains

Another great style is tab top curtains. This heading uses loops instead of eyelets, curtain rings or header tape and hooks, these loops are made from the same material that is used for the curtains themselves or can be a contrasting material. They can also be shaped to enhance the pattern of the curtain of theme of the room.
These curtains are not tightly gathered in the same way as pencil pleat heading but the fabric falls naturally between the loops. Usually one and a half times the window width, so not as much fabric is needed for this type. If this amount of fabric appears too much then one window width can be used and the amount of gathering reduced.
Tab top curtains are really versatile as suits most fabric types. It is good for lined and unlined curtains made from thick or fine material with the natural weight of the material making the folds.
If the tabs are going to be made from the same material as the curtain there are some additional calculations to do.
Tab Length -To work out the length of the tab measure around the pole and then add 4 inches (10cms) the ones in the picture are 8 inches long (20cms).
Tab Width - Decide on the width of the tabs and how many are needed. The tab width is usually between 2 and 3 inches (5-7.5cms) when they are finished. There are usually two tab widths between each tab, for example if the tab was a finished width of 2 inches (5cms) the distance between the tabs would be 4 inches (10cms). Measure the curtain width to determine how many are needed and then add the extra length to the finished length so there is enough fabric for the tabs.
Curtain Facing -Allow 4 inches (10cms) for a facing at the top of the full width of the curtain. To give strength to the facing attach some interfacing to the wrong side. In the curtains shown above a double facing was used instead.
Sewing Steps for Tab Top Curtains
The finished width = Width of pole x one and a half (gathering) divided by fabric width = number of widths needed.
The finished or length wanted is the length from curtain track or pole to the required length add to this the amount of fabric needed for the tabs, heading, facing and hem to get the cut length.
The window should have already been measured and the amount of fabric already calculated and any adjustments for pattern matching already done. The curtains at this stage should be ready for the tab top heading after the side and lower hem has already be sewn.
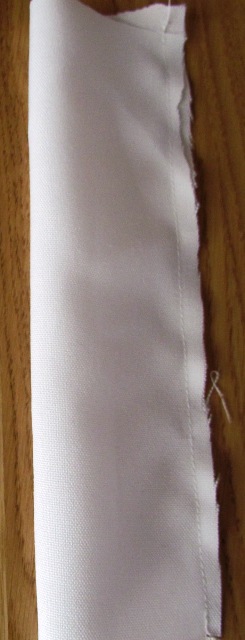
Cut out the tabs the length wanted and double the width so there is only one seam when folded to the width wanted. Place right sides together and sew seam. Turn tab right side out and press so that the seam is in the middle of the tab back. Continue until all the tabs have been made.

Place the tabs on the right side of the curtain keeping the distance between them equal making sure one is placed at each end of the curtain first.
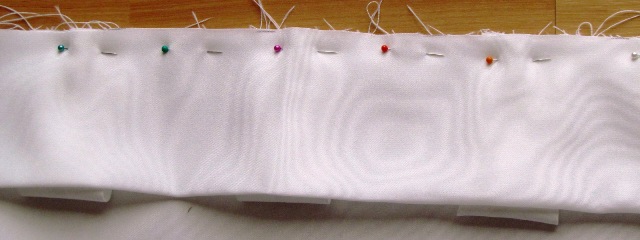
After attaching the interfacing and finishing off the lower hem by turning up an inch (2.5cms), place facing right side down over the pinned tabs on the right side of the material. Pin facing to material catching the tabs as well. Sew seam.
Press facing to the wrong side of the fabric allowing the tabs to be at the top of the curtain. The bottom edge of the facing can be slip stitched in place or machine stitch if wanted. In the ones shown in the picture the top seam of the facing was top stitched for extra strength and the side seams were also machine stitched closed.
Have fun making your tab top curtains.
If you are not too sure about making curtains there are plenty to choose from in many shopping outlets.
Affiliate offers
Please take care with any soft furnishing that it does not come into contact with any heat source.
If you have found an error on this page or want some more information on sewing cushions.
Please contact me . Thank you
Return from Tap Top Curtains to Curtains and Drapes
New! Comments
Have your say about what you just read! Leave me a comment in the box below.