How to knit cables
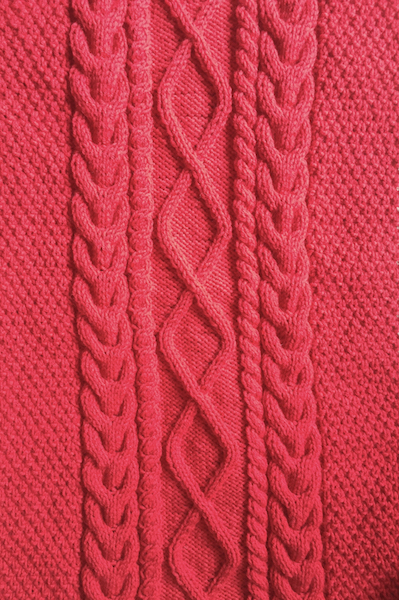 Panel knitted in different cable stitches.
Learning how to knit cables in garments or other items changes the look from one that has been knitted in stocking stitch.
The main difference in knitting a cable to doing the stocking stitch in knitting is that cable knitting uses an extra needle.
This extra needle is called a cable needle and allows the wool to be move from the front to the back or back to front, it can hold a stitch while a few more are knitting thus elongating the stitch.
The patterns cable knitting can give vary greatly and look very complicated but if the steps are broken down into smaller steps and the abbreviations in knitting patterns are followed then end result can be stunning.
How to knit cables with the C4B abbreviation - in video
Cable knitting the C4B abbreviation - the steps
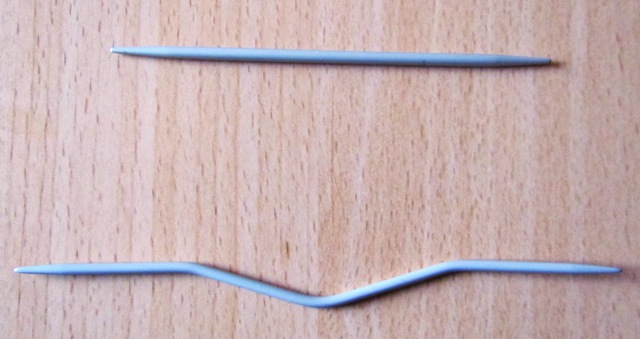 The cable needles
Make sure a cable needle is used, this extra needle is usually a lot smaller that the main needles.
The small needle can be straight or it can have a little kink in the middle which helps to stop the stitches slipping off.
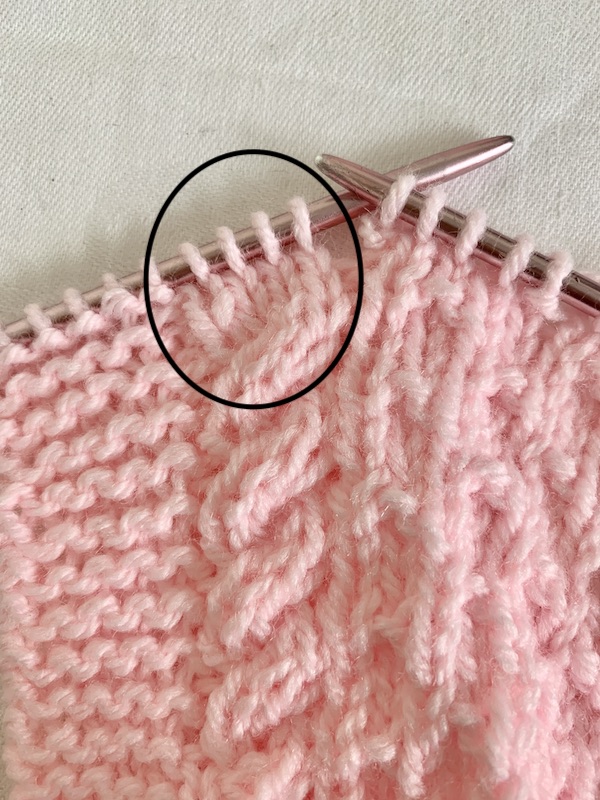
This section that is highlighted by the oval shape is the four stitches that make up this cable stitch.
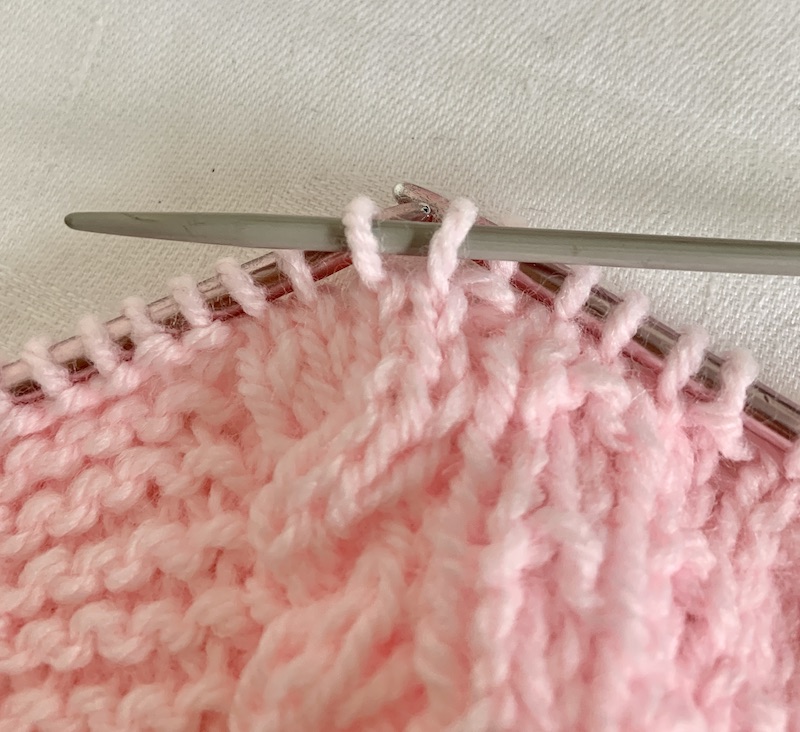
The first two stitches of the four stitches are placed on the cable needle without being knitted.
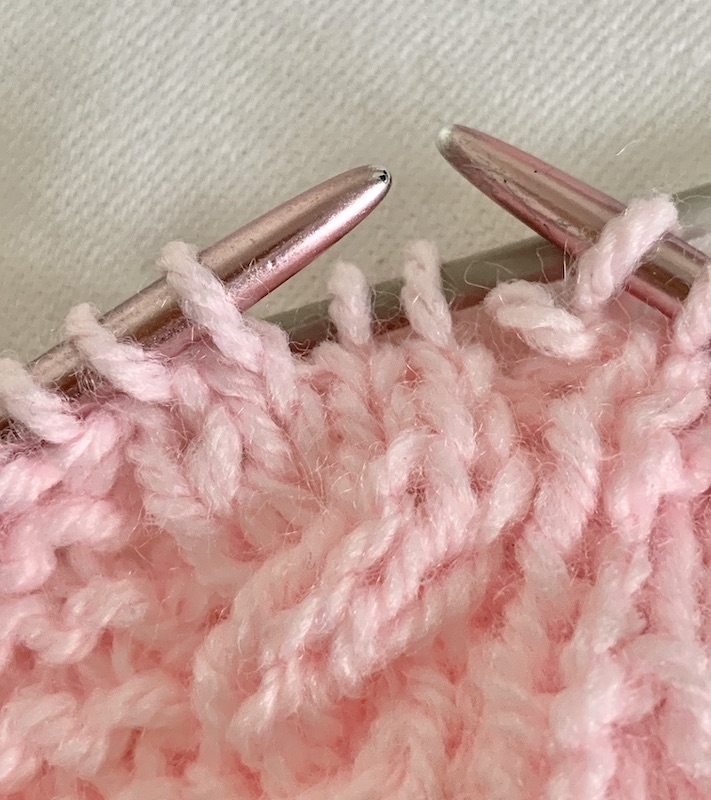
These are then taken to the back of the knitted work ready to be knitted later.
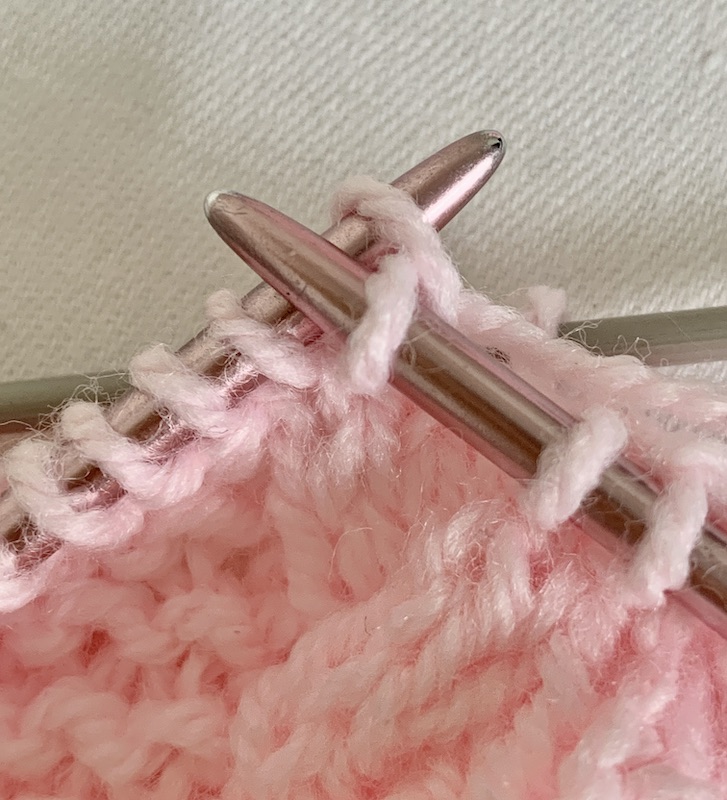
With the first two stitches still held on the cable needle at the back of the work, knit the second two stitches from the main knitting needles.
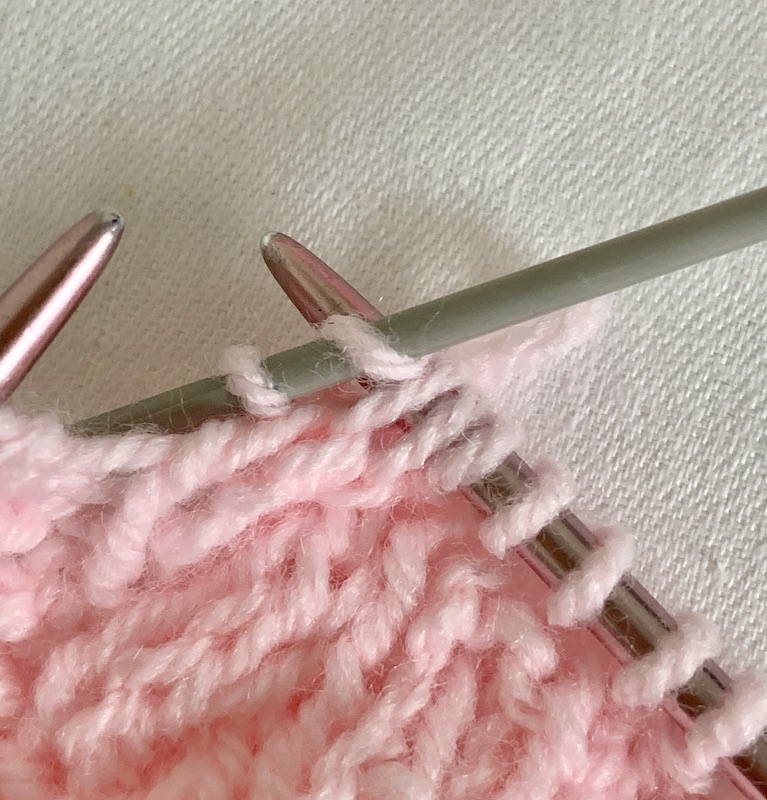
The stitches from the cable needle are now ready to be knitted and by putting them on the cable needle their position in the row of stitches has changed.
After both stitches have been worked the cable needle is removed.
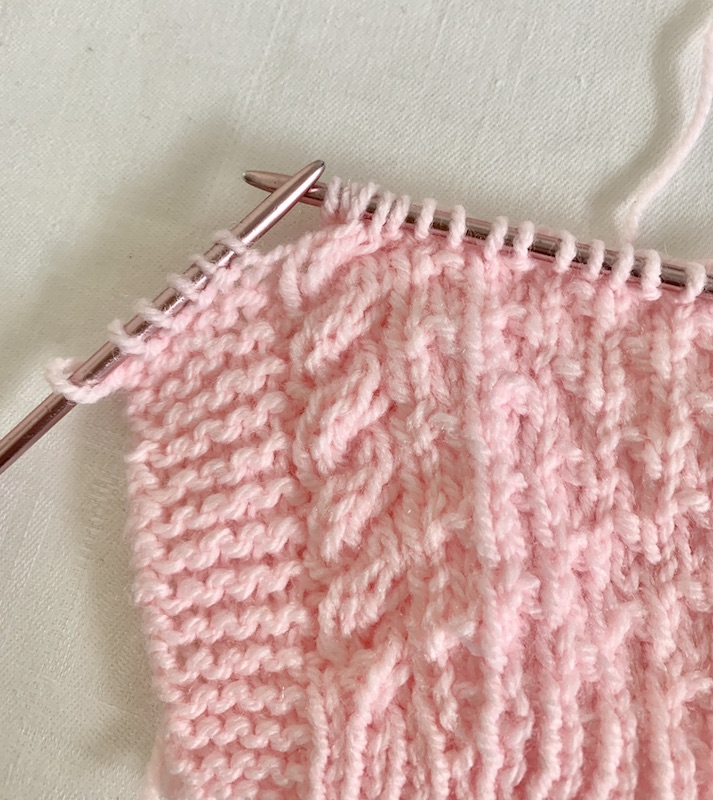
The four cable stitches have now been completed and the pattern continued further up the cardigan front.
When doing the next row these stitches will be knitted in a purl stitch.
The C4B abbreviation in cable knitting is probably one of the first cabling stitches to master. The look it gives to the garment is quite bold and striking.
Sometime when knitting cables there could be many of these along the row of stitches and so not to loose the cable needle it could be put into the rib of the work so it is handy when it is required.
I usually place it within the jumper I am wearing and then wonder where I put it.
How to knit cables with the C4F abbreviation with 2 extra stitches - in video
Knitting the C4F abbreviation with 2 extra stitches.
This cable stitch was part of a repeated pattern. In between the rib panel there was a cable repeated four times along the needle.
Once the pattern has been started, the pattern can let the knitter know what comes next.
This is an easy pattern as cable knitting in aran jumpers or cardigans can get very complicated so take the cable in small steps at first.
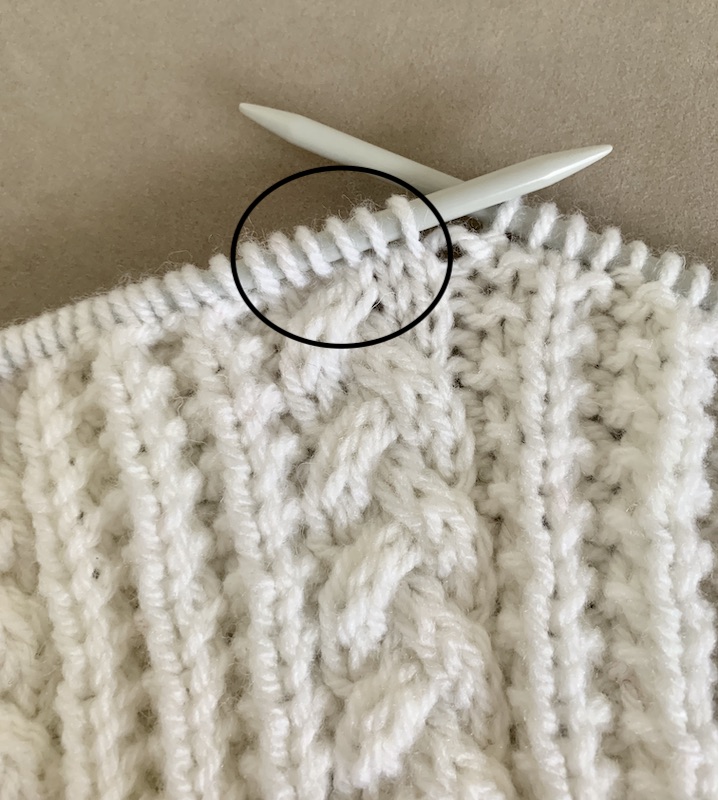
This is the six stitches (highlighted by the oval) used in this cable pattern.
Depending which end of the pattern the cable twist is being done there will be two extra stitches.
At the start the pattern looks different from the rest of the knitting so this is where the pattern is saying "something needs to be done with these two stitches".
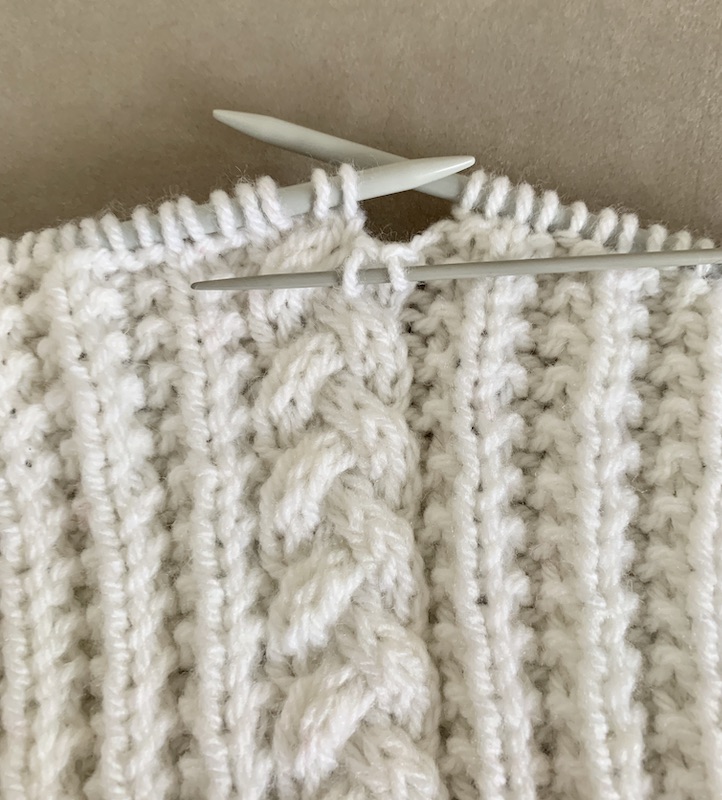
The knitting stitch that is being done is C4F.
Which means there are four stitches to cable and the first two stitches have to be brought to the front of the work.
Take the cable needle and slip the first two stitches onto it and then bring the cable needle to rest at the front.
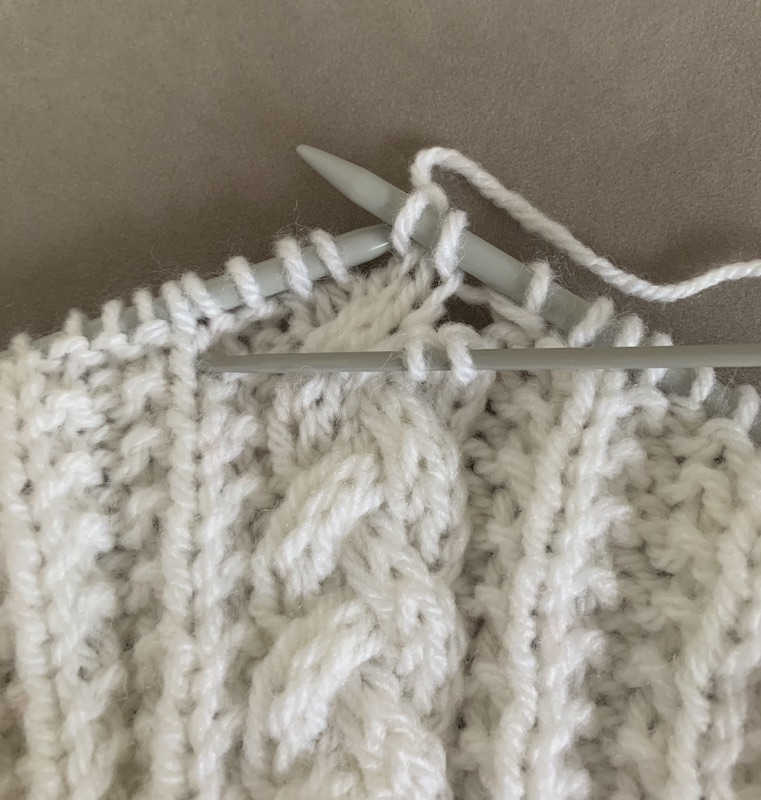
The next two stitches are in the middle of the six and these are knitted as usual.
This knitting elongates the fold coming from the other side and will be hidden from view when finished.
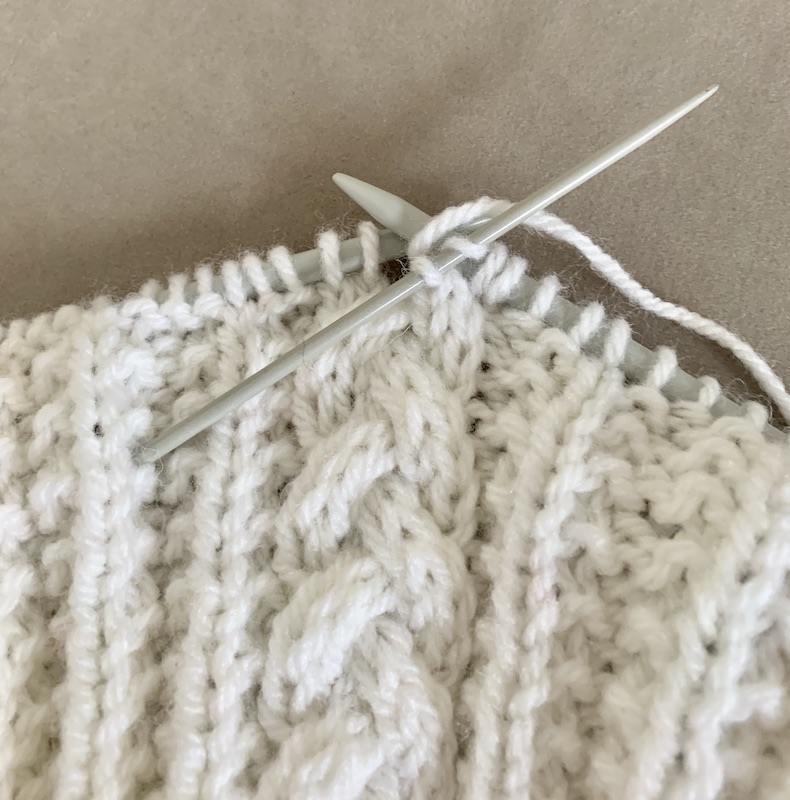
The pattern now needs a fold to be done and this is achieved by knitting the two stitches from the cable needle in the usual way.
Take the cable needle out and keep it handy for the next time it will be used.
In this pattern it will be the next right side.
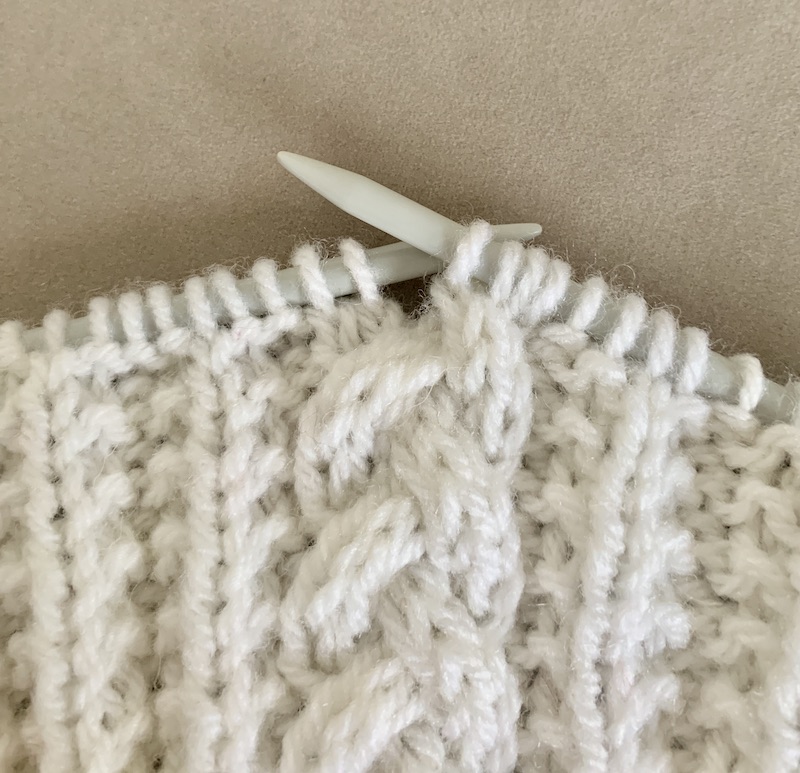
The fold from the right has now been done.
Now the pattern is saying "the next two stitches are too short to do anything with".
These two stitches are then knitted in the usual way.
The C4F+2 stitch steps shown above will use the C4B stitch steps shown with the pink wool.
The pattern is continued along the needle following the knitting pattern guide. The wrong side of the work is just basic purl and knit stitches.
When the next right side row is facing and the cable is being done, the stitches will start with the two knitted stitches as they will be too short to do any folding.
The middle two stitches will be taken to the back of the work on a cable needle.
The last two stitches will be knitted in the usual way and then the two from the cable needle will be knitted last.
This cable pattern always uses six stitches.
Many outlets both on line and off line sell wool for your projects. The Range and My fabrics do have a knitting section.
Enjoy and have fun learning how to knit cables.
- Home
- Knitting for Beginners
- How to Knit Cables
Affiliate offers
Please take care with any soft furnishing that it does not come into contact with any heat source.
If you have found an error on this page or want some more information on sewing cushions.
Please contact me . Thank you
New! Comments
Have your say about what you just read! Leave me a comment in the box below.