How to Crochet Granny Squares.
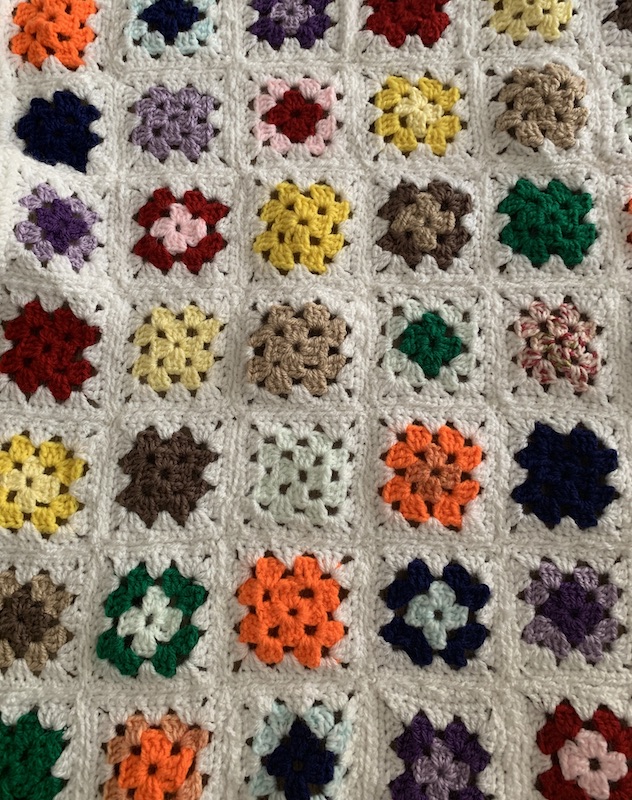 Blanket made with granny squares.
Learning how to crochet granny squares can seem very daunting. This could be because there are so many holes formed when doing the trios of treble crochet.
Once the technique to making crochet granny squares have been mastered then items can be made by joining single ones together to make blankets, cushion covers, bags and even waistcoats.
Lot of different colours of wool can be used if making single ones in one colour or the wool can be changed when halfway through one square. The size can be change to suit the item being made.
In the blanket shown above one granny square was made as the beige in the very centre, then this square was made bigger by going round and round changing the colours every two or so rows.
Recap on the treble stitch to crochet granny squares.
Wrap wool around hook before going under the "V" of a chain stitch, go into the "V" wrap the wool around the hook and through the chain giving three stitches on the hook.
Wrap the wool around the hook and pull through the first two stitches, leaving two stitches on the hook.
Wrap the wool around the hook for the third time and pull through the remaining two stitches leaving one stitch on the hook.
How to Crochet Granny Squares - The Basics
Start with a slip knot
nter>
Make a crochet chain using a chain stitch
How to Crochet Granny Squares - The First Round
When learning to crochet granny squares the first round comprises of four sets of a trio of treble stitches and chains of three crochet chains to act as the corners.
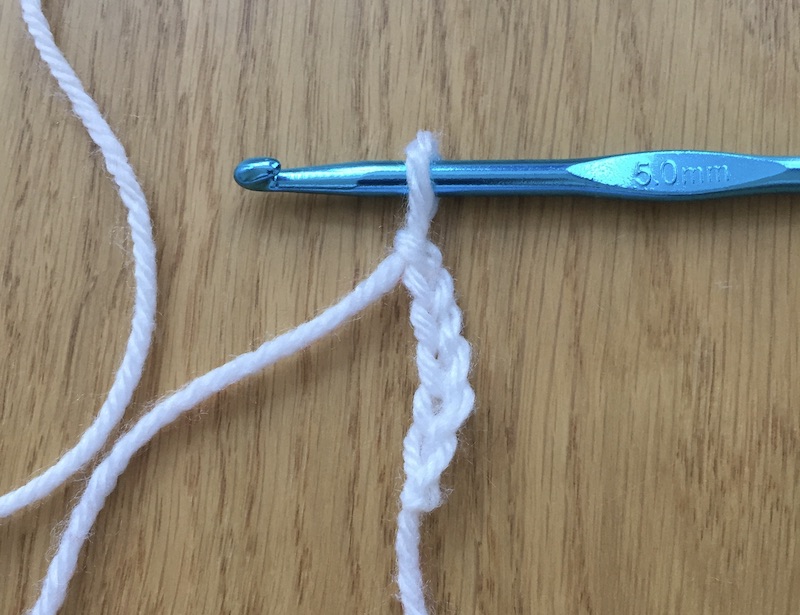
To make a granny square start with a length of six crochet chains. That will be six underneath the hook.
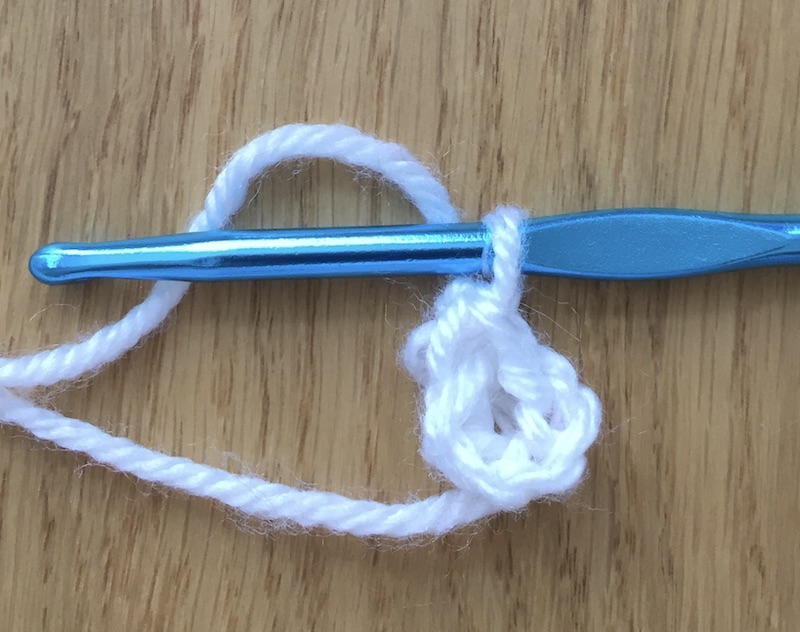
The length of chain stitches needs to be turned into a circle and this is done by putting the hook through the "V's" of the first chain grabbing the wool and pulling through both stitch.
This makes sure that no extra height is added and the ends are joined together. Slipping the stitch through another one.
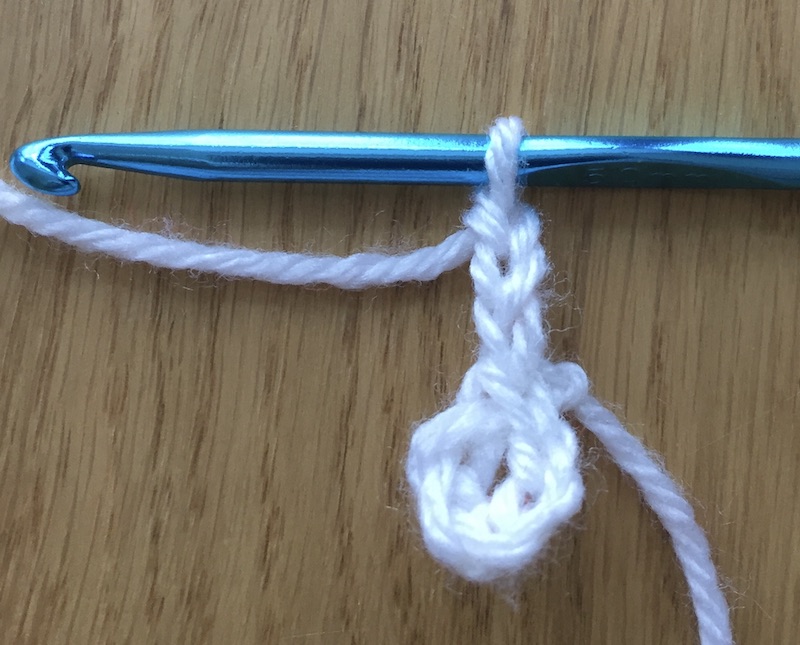
When starting the first treble stitch the first stitch is usually three chain stitches which represents a mock treble and give the height needed.
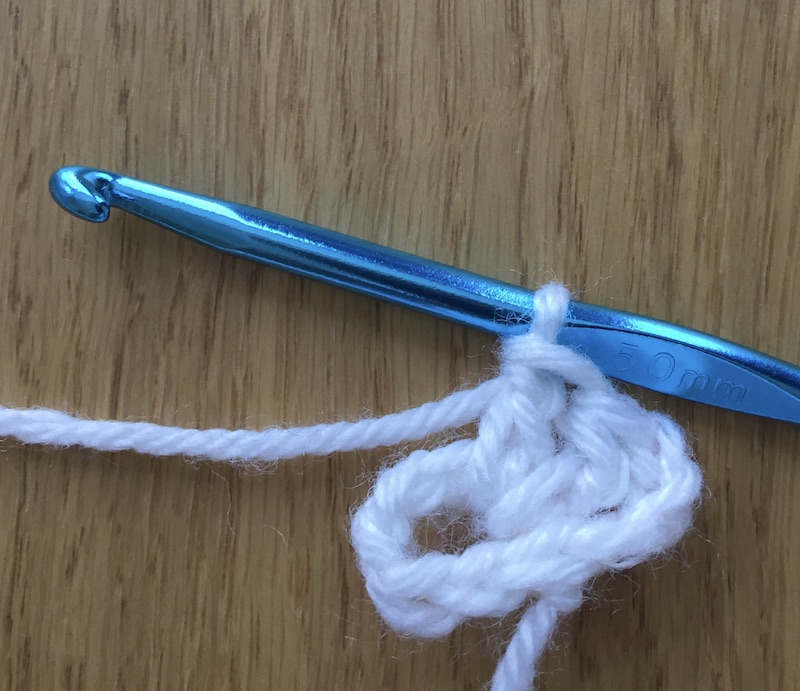
The granny square stitches are groups of three treble stitches, this mock stitch counts as one and the first trio is completed by doing two treble stitches not into a "V" of a chain but into the middle of the circle that has just been made by joining the ends.
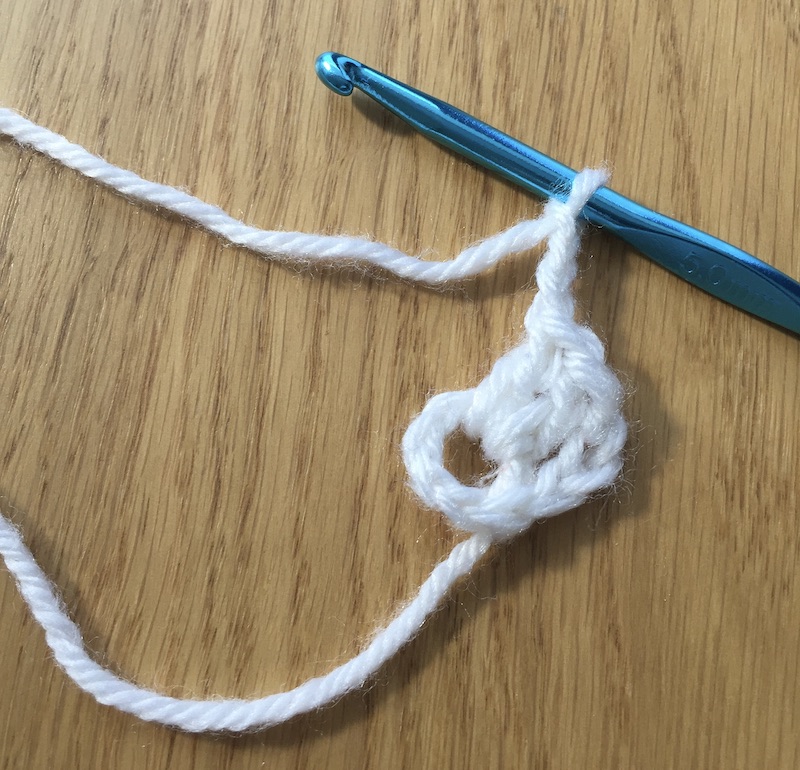
One set of a trio of treble stitches is done. The next step is to do three chains that will make the corner of the square.
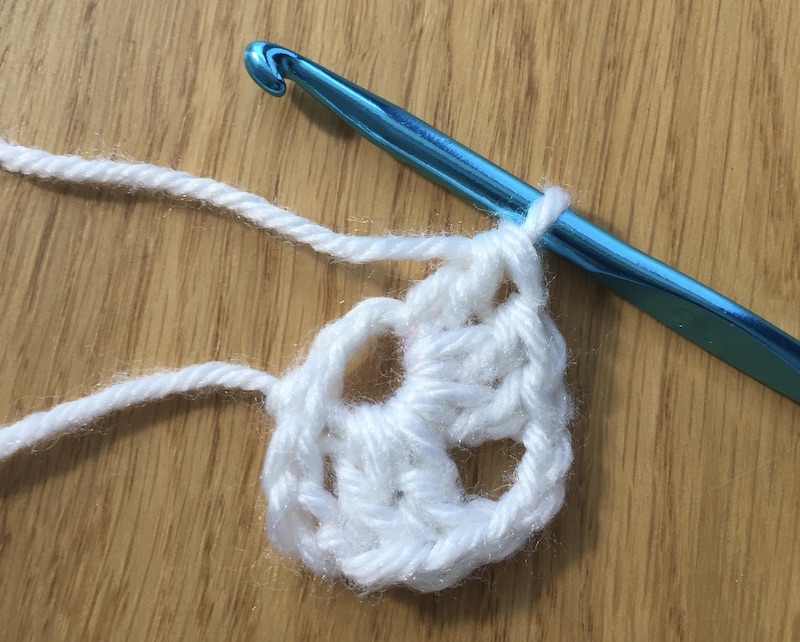
Into the centre of the ring make the second trio of treble stitches and the second set of three chain
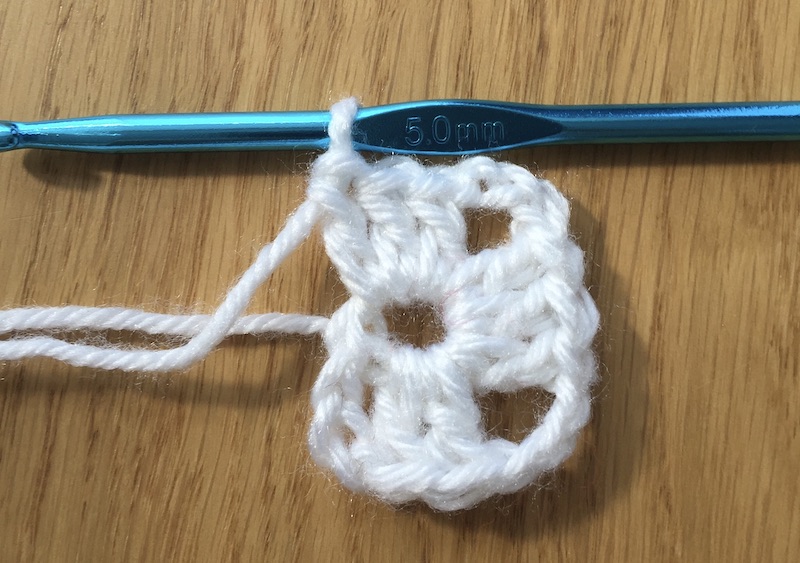
Into the centre of the ring make the third set of treble stitches and another three chain.
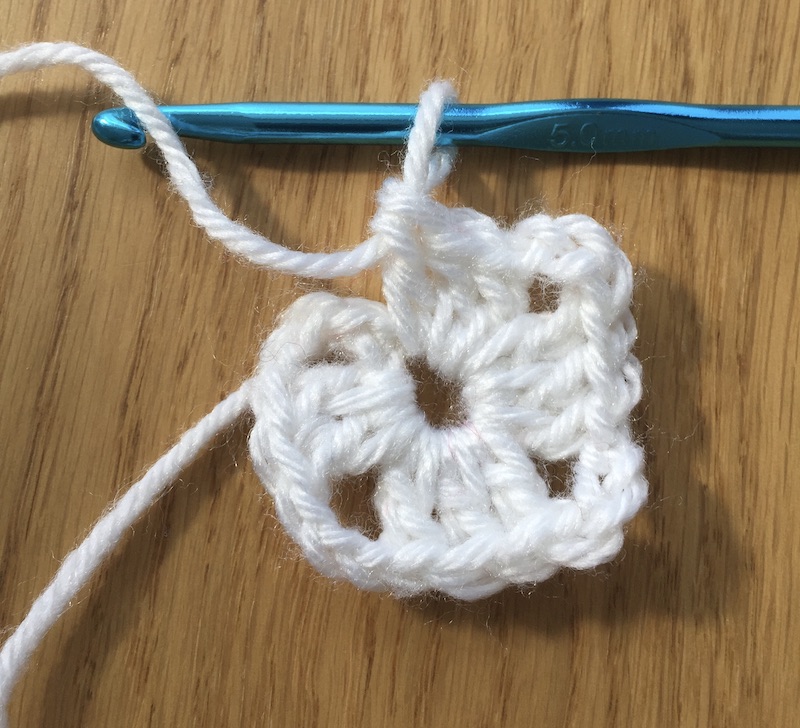
Into the centre of the ring make the fourth set of treble stitches and another three chain.
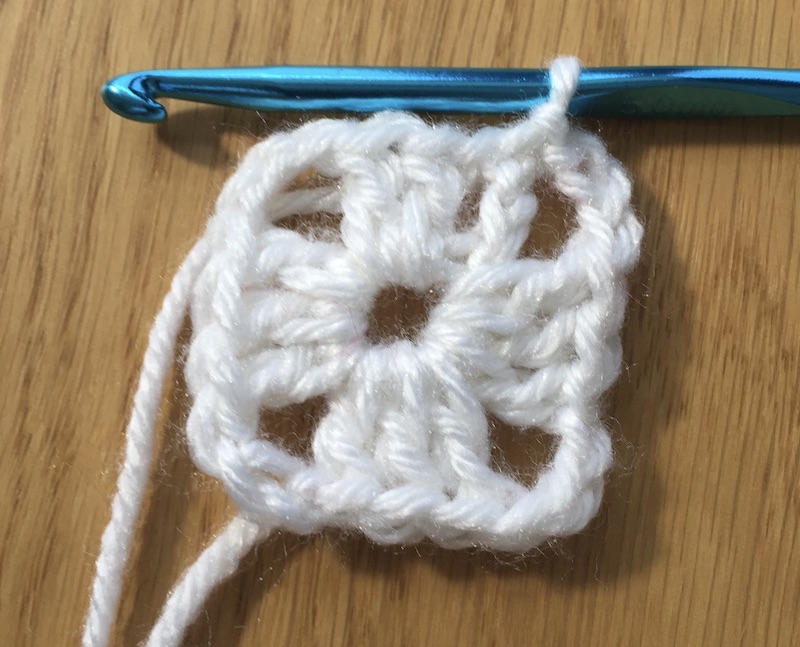
After four sets of three treble stitches and four lengths of three chains, the first round of the square is finished.
Slip stitch under the top of the first of the three chain to join ends.
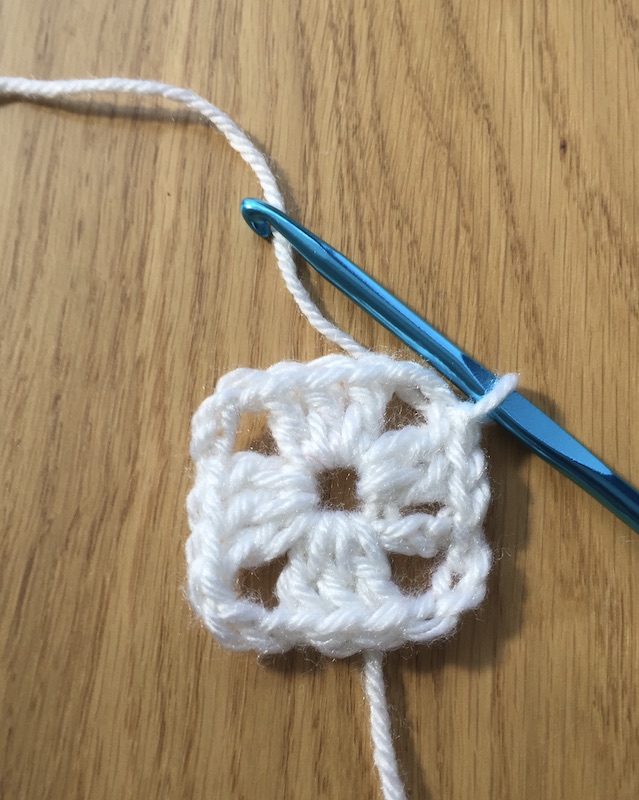
The next round of the square always starts at a corner. Slip stitch another three chain to get up to the corner to begin the second round.
There is no added height but just moving the wool up to the correct place without doing any stitches.
First Round - In Video
How to Crochet Granny Squares - The Second Round
At the start of any round the colour of the wool can be changed. This is done by grabbing the new colour onto the hook then cutting the old colour and fastening in the new colour. The ends can be weaved into the square at the end. There are other ways this can be done but for me this is the easiest.
As the square gets bigger it is important to know which gap the stitches are going into.
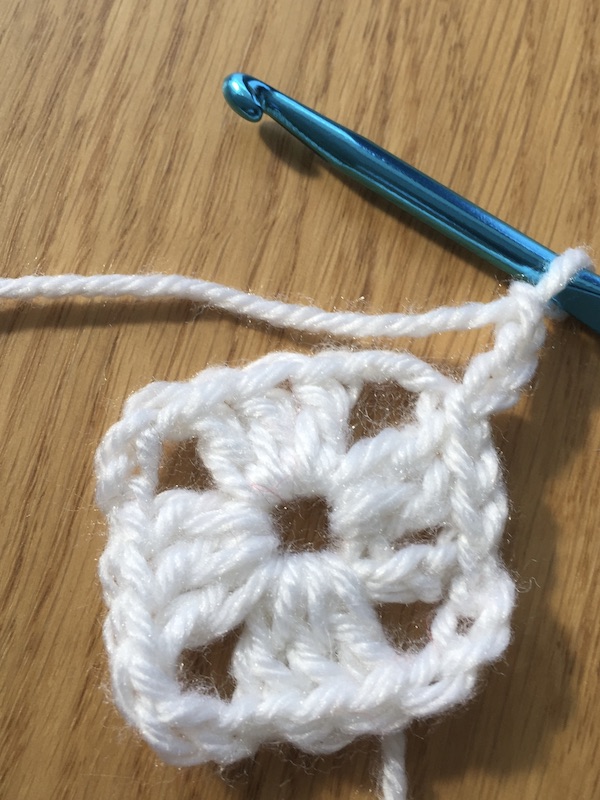 Starting at the corner gap begin the new round with a chain of three.
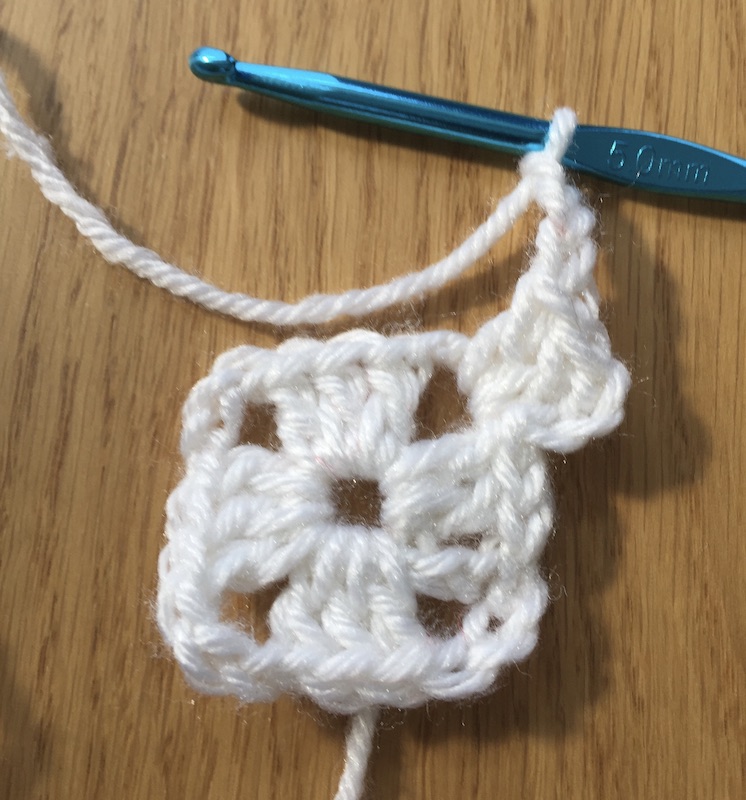 Complete another two treble stitches and then three chain stitches to complete the first set of three trebles into the corner gap. The three chain acts as a mock stitch.
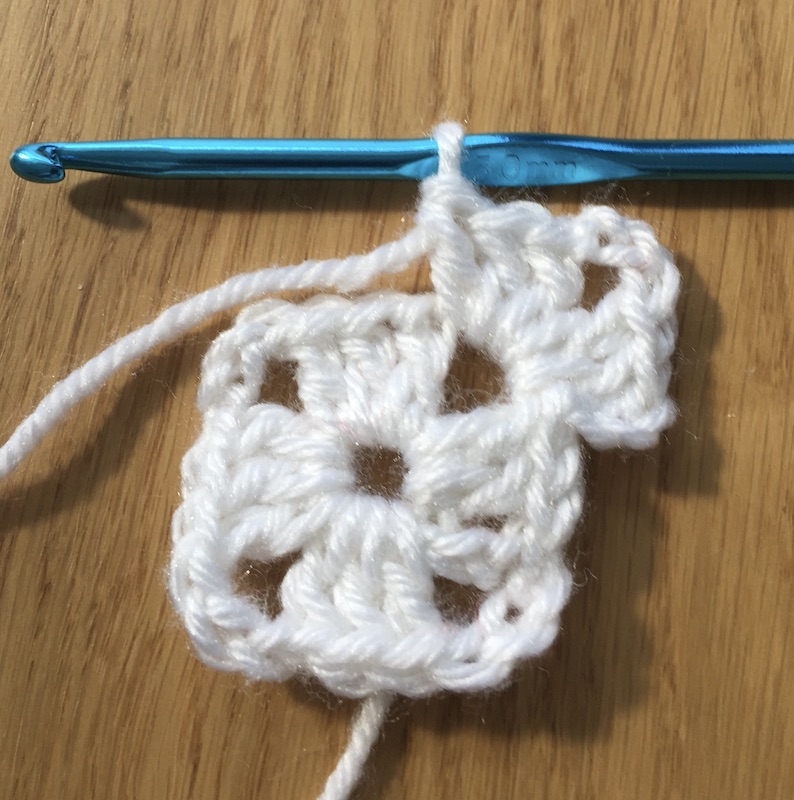 Into the same corner gap make another three treble stitches but after these just do one chain stitch.
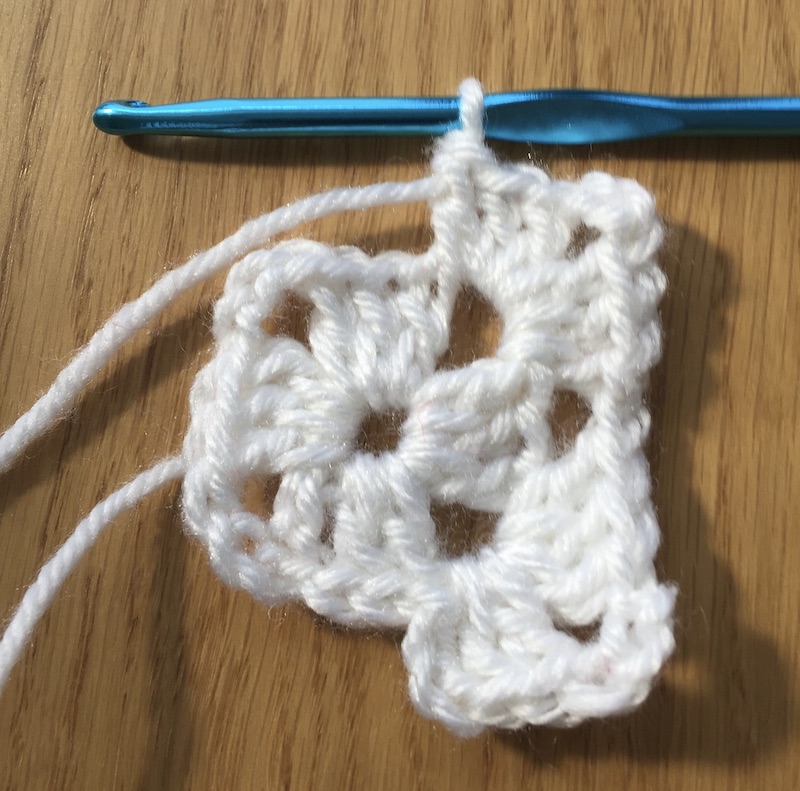 Into the second corner gap make three treble stitches then three chain stitches then another three treble stitches and then one chain stitch.
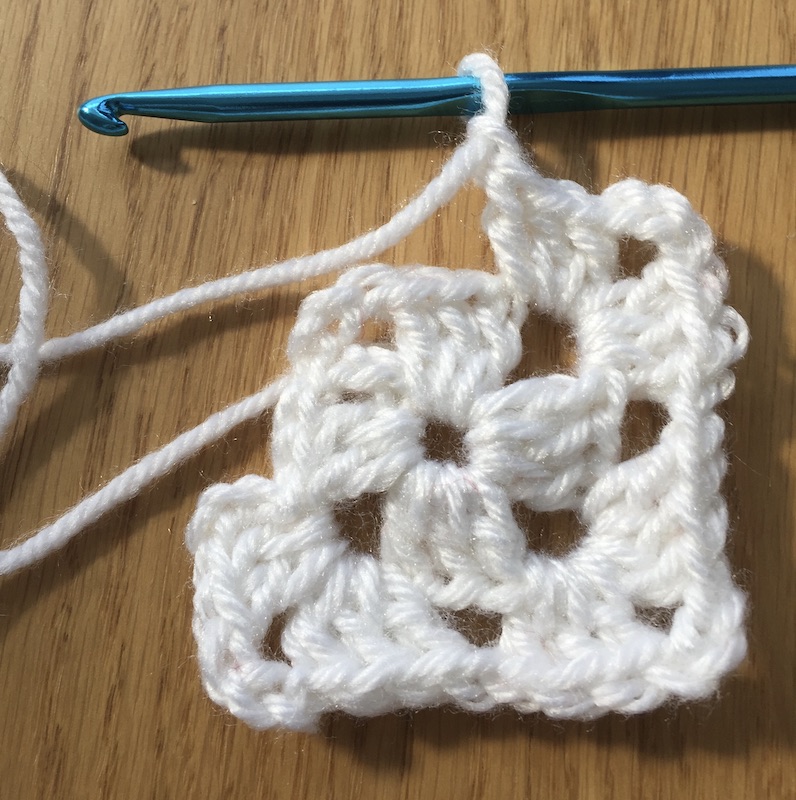 Into the third corner gap make three treble stitches then three chain stitches then another three treble stitches and then one chain stitch.
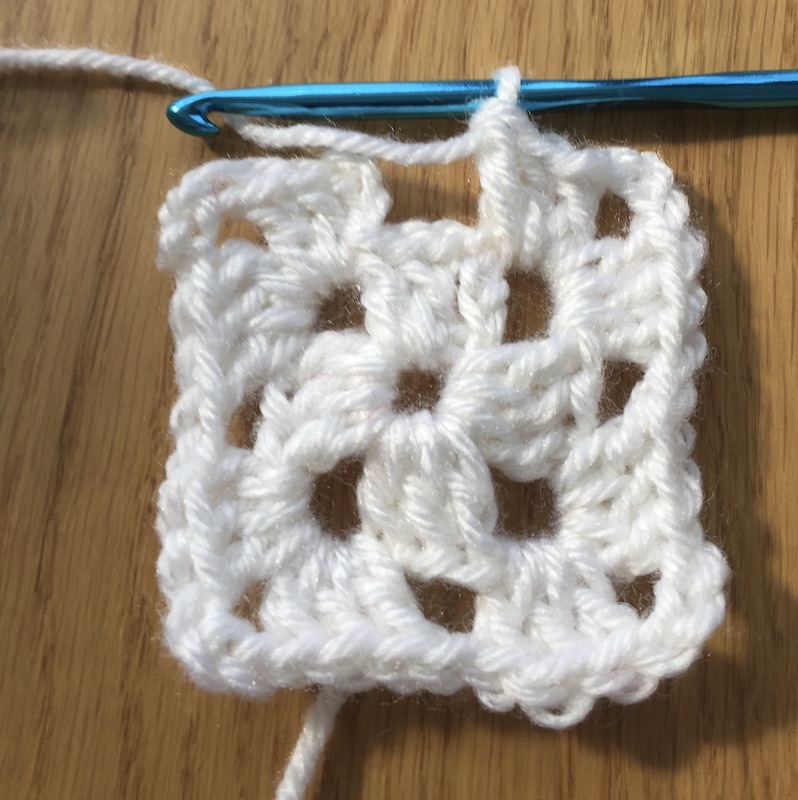 Into the fourth corner gap make three treble stitches then three chain stitches then another three treble stitches and then one chain stitch.
When at the end of the second round slip stitch to close the gap and then continue to slip stitch to move the wool up to the next corner to begin the third and final round in the granny square.
Second round - In video
How to Crochet Granny Squares - The Third and final round
In my granny square I changed the colour of the wool in this round.
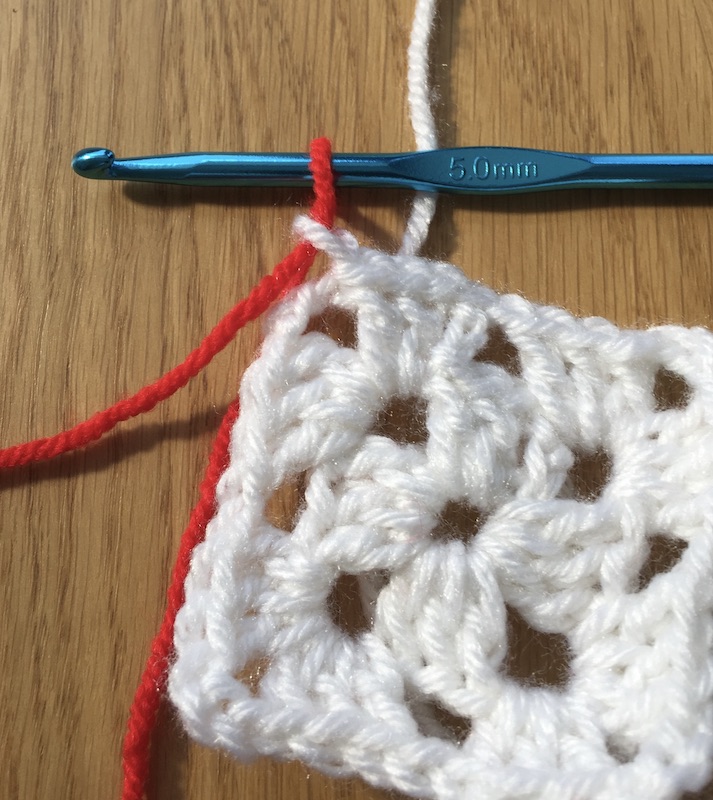 Using the new colour wool grab the wool with the hook and pull through the stitch on the hook.
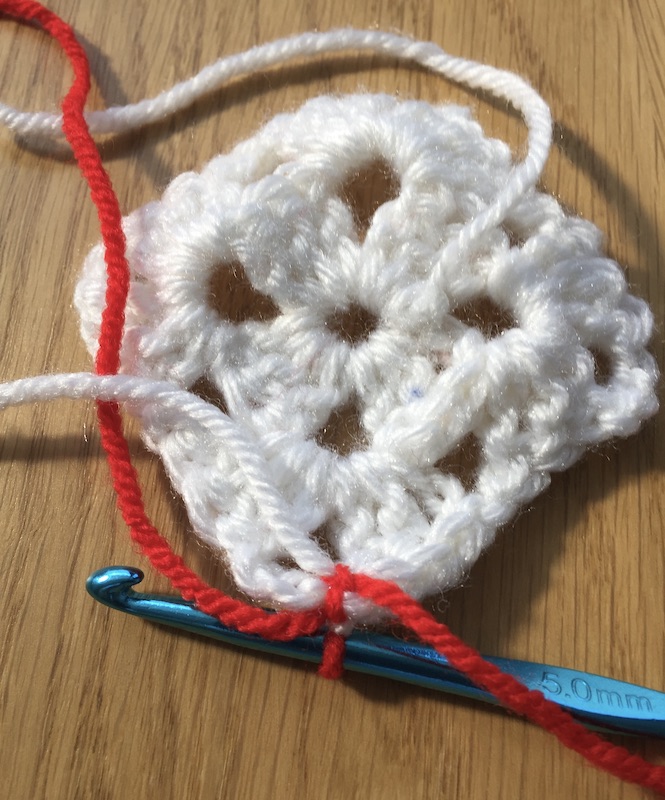 Turn work to the back, cut the old colour leaving a good length and then knot the new colour to the cut length.
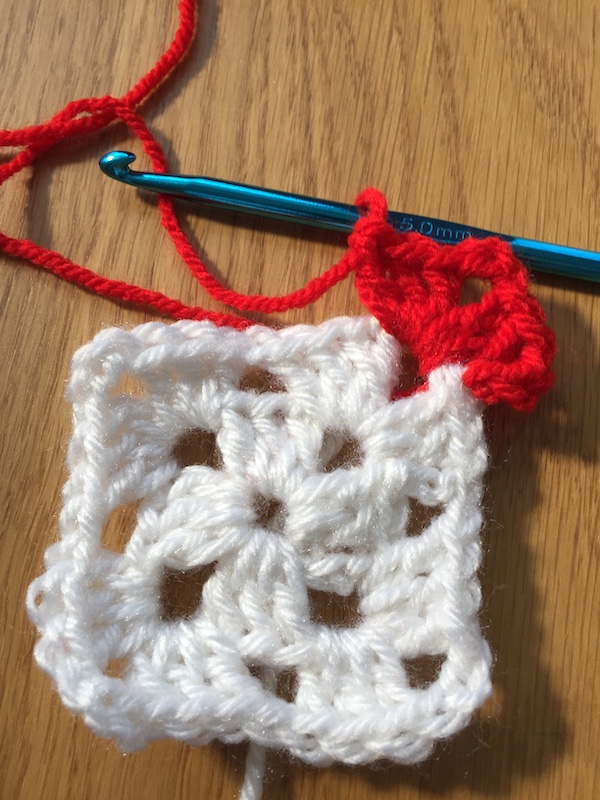 Using the new colour begin in the same way as before into the first corner and do three chain and two treble crochet stitches. Then three chain stitches and again another three treble crochet stitches.
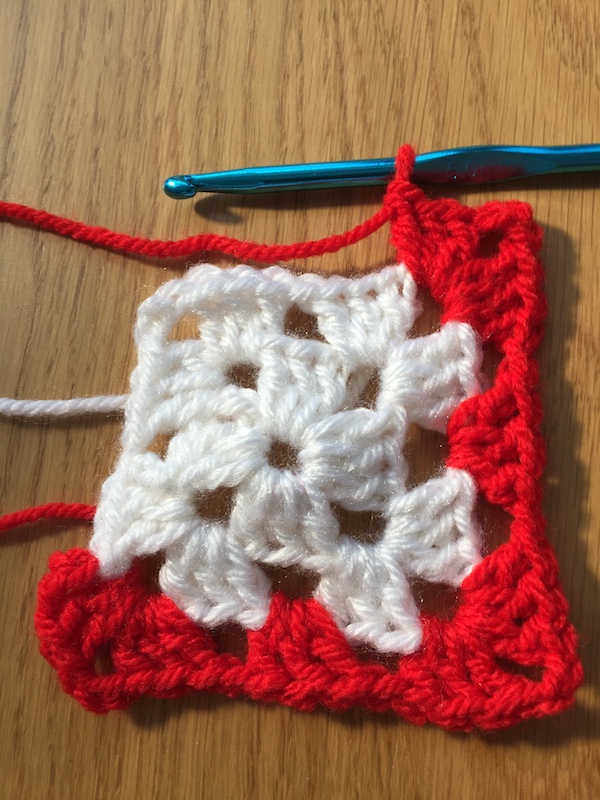 To finish off the second side of the third round after the second trio of trebles in the corner gap do one chain stitch and then three treble crochet stitches into the gap between the two corners then another one chain stitch. This takes the work back to the corner where another three treble crochets, three chains and the second group of three treble crochets are done. Repeat for the third and fourth sides.
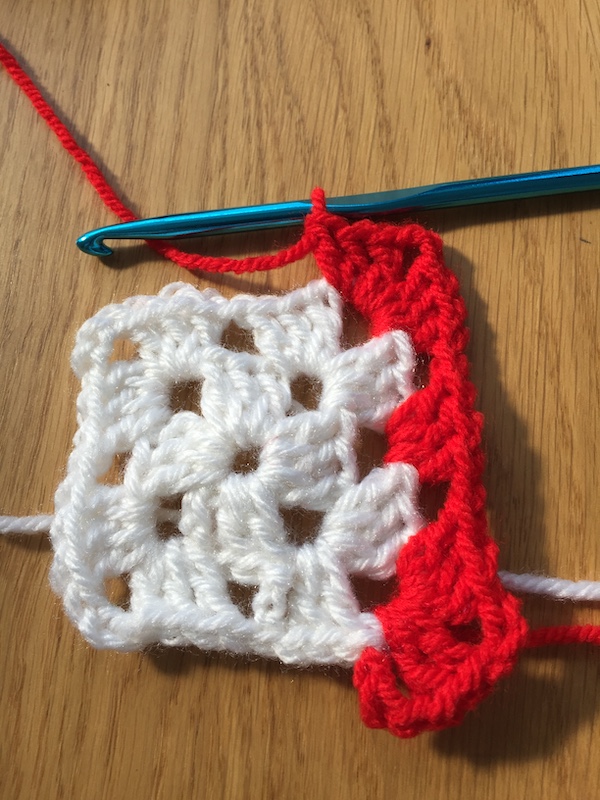 To finish off the first side of the third round after the second trio of trebles in the corner gap do one chain stitch and then three treble crochet stitches into the gap between the two corners then another one chain stitch. This takes the work back to the corner where another three treble crochets, three chains and the second group of three treble crochets are done.
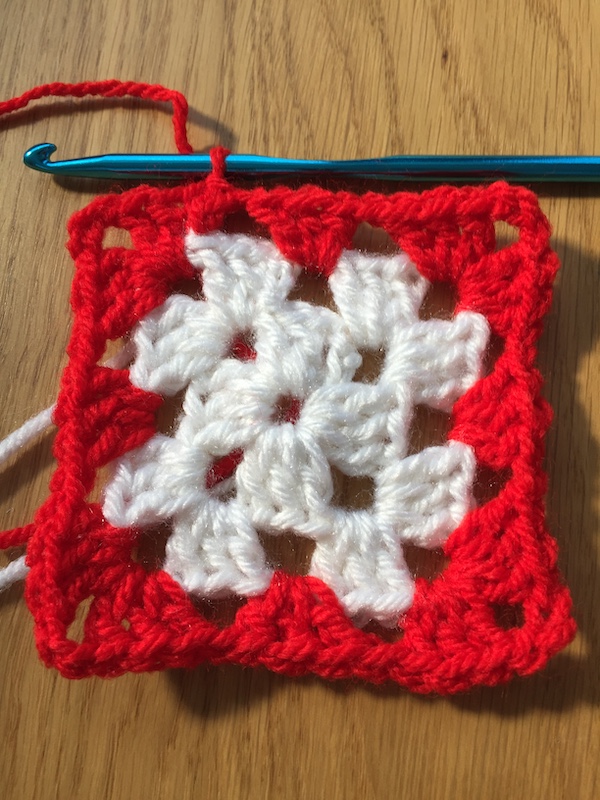 When all side are completed either cut the wool and pull through the stitch to fasten off if doing individual ones or do a few slip stitches to get the wool up to the corner to begin the next round. Stay with the same colour or change again.
Remember in each corner there are three treble stitches then three chain stitches (which give the corner shape), another three treble stitches and finishing with one chain.
There will be more gaps as the square gets bigger and apart from the corners each gap has a trio of treble stitches.
The third round would be three treble, three chain, three treble and one chain into the first corner gap. Into the middle gap make three treble stitches and one chain. Into the next corner do the same as the first corner and continue until you get back to the start.
In the fourth round there will be corner, gap, gap and corner so there will be three trebles stitches and one chain into each single gap in-between the corners. the one chain makes it easier to reach the next gap whether corner or not.
Have fun trying to crochet granny squares.
- Home
- How to Crochet For Beginners
- How to Crochet Granny Squares
Affiliate offers
Please take care with any soft furnishing that it does not come into contact with any heat source.
If you have found an error on this page or want some more information on sewing cushions.
Please contact me . Thank you
New! Comments
Have your say about what you just read! Leave me a comment in the box below.